Let say you have a Lightning Component placed on the Account record page and you want to listen to changes that occur outside our component. For example, in your component, you display some Account data and that must be refreshed once the user clicks on the standard save button.
We are going to write an example to show how we can accomplish this.
So we need to:
- Create a Lightning Component
- Create a Lightning Component controller
- Create an Apex class to simuate some backend work
Example of listening to changes outside our component
Let’s create an example to see how it works.
For sake of simplicity, this component just displays the name of the Account that we get from an Apex controller
Now we want our Lightning Component to be updated once the Account’s name was changed through the standard layout.
Create a component
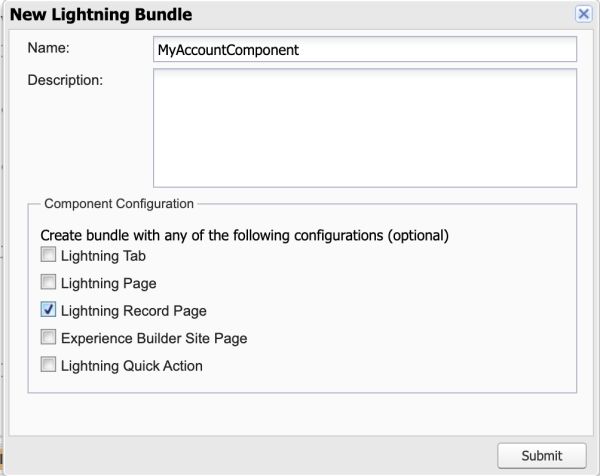
It’s important to check the “Lightning Record Page” to receive the record id by URL parameter and also to be able to place this component into the Account record page.
<aura:component controller="MyAccountComponentController" implements="flexipage:availableForRecordHome,force:hasRecordId" access="global" >
    <aura:handler name="init" value="{!this}" action="{!c.doInit}"/>
    <aura:attribute name="recordId" type="String" />
    <aura:attribute name="accountName" type="String" />

    <!-- To listen to when the Account was changed and update our component -->
    <force:recordData aura:id="forceRecord"
                      recordId="{!v.recordId}"
                      fields="Name"
                      recordUpdated="{!c.doInit}" />

    <article class="slds-card">
        <div class="slds-card__body slds-card__body_inner">
            <span class="slds-text-body_regular">{!v.accountName}</span>
        </div>
    </article>
</aura:component>
Create the UI controller
({
    doInit : function(component, event, helper) {
        const recordId = component.get('v.recordId');

        var changeType = event.getParams().changeType;
        console.info('event change type '+changeType);

        var action = component.get("c.getAccount");
        action.setParams({
            recordId : recordId
        });
        action.setCallback(this, function(response){
            var state = response.getState();
            if(state === "SUCCESS"){
                var account = response.getReturnValue();
                component.set("v.accountName", account.Name);
            } else if(state === "ERROR"){
                console.log('Error: ' + JSON.stringify(response.getError()));
            } else {
                console.log('Unknown problem, state: '+ state + ', error: ' + JSON.stringify(response.error));
            }
        });
        $A.enqueueAction(action);
    }
})
In our example, we are not asking for the event type but we could this way tho make different actions
if (changeType === "ERROR") { /* handle error; do this first! */ }
    else if (changeType === "LOADED") { /* handle record load */ }
    else if (changeType === "REMOVED") { /* handle record removal */ }
    else if (changeType === "CHANGED") { /* handle record change */ }
Create the Apex controller
public class MyAccountComponentController {

    @AuraEnabled
    public static Account getAccount(String recordId){
        try{
            return [SELECT Name FROM Account WHERE Id = :recordId];
        }catch(Exception e ){
            throw new AuraHandledException('Error getting Account '+e.getMessage() + ' record id: '+recordId);
        }
    }
}
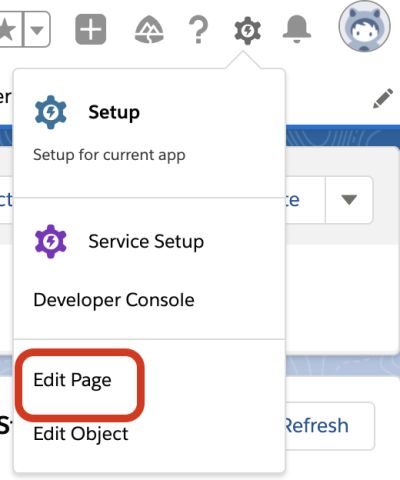
Add the component
After we create our Lightning Component, let’s add it to our Account’s record page
Drag and drop our Component. In this case, I’m positioning at the top of our side bar
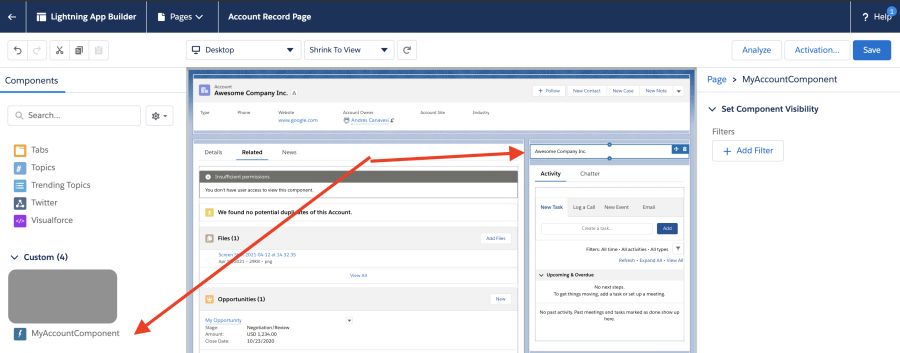
Save the page and activate it if it is necessary.
Test it
Our last step is to change the name of any account and see how our component is updated.
Have in mind we are making an API call to our Apex controller. That change doesn’t come from the frontend, we have to go to our Salesforce backend and run the query to get the new name.
Reload record
In case we are in edit mode, we may call this method to reload our component based on new changes that come from outside
component.find("forceRecord").reloadRecord();
Resources
Photo by Paul Skorupskas on Unsplash